Tips And Tricks For Elegoo Mars 3
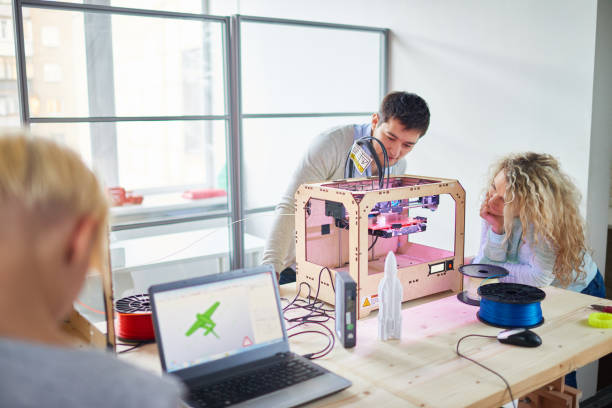
Group of young engineers making prototype of plane with 3D printing in technology laboratory and observing process
Elegoo Mars 3 is one of the most popular 3D resin printers due to its affordability and ease of use. However, there are certain tips and tricks that you should know to make the most out of your Elegoo Mars 3.
From knowing the differences between the Elegoo Mars 3 and the Elegoo Mars 3 pro, to understanding the basics of 3D resin printing, the following section will provide tips and tricks to get the most out of your 3D resin printer.
Elegoo Mars 3 vs 3 Pro
Elegoo Mars 3 and 3 Pro are 3D printers that are similar in many ways but have a few differences that set them apart. Let’s take a closer look at these differences to help you decide which one is the right fit for you. Some of the key differences between Elegoo Mars 3 and 3 Pro include the fact that the 3 Pro model has a carbon filter for air purification, a monochrome LCD screen for faster printing, and an aluminum build platform for increased durability.
Some tips and tricks to keep in mind when using Elegoo Mars 3 include using the right resin for your project, leveling the build plate correctly, and cleaning the resin tank and build plate after each use to prevent damage to the machine. It is also important to maintain the printer regularly and upgrade the firmware as needed for optimal performance. Whether you choose Elegoo Mars 3 or 3 Pro, both are excellent choices for affordable and high-quality 3D printing at home.
Leveling the Build Plate for Successful Prints
Leveling the build plate is essential for achieving successful prints on your Elegoo Mars 3 printer. The build plate is the flat surface where your prints are created, and if it is not level, your print may fail due to uneven extrusion or adhesion issues. Here are some tips and tricks to help you level the build plate of your Elegoo Mars 3 printer:
- Make sure the printer is on a flat and stable surface.
- Use the built-in leveling feature of the printer to adjust the height of the build plate.
- Use a piece of paper or a feeler gauge to check the distance between the build plate and the LCD screen, adjusting the height as needed.
- Clean the build plate before each print to ensure optimal adhesion.
- Consider upgrading to the Elegoo Mars 3 Pro, which features an improved build plate leveling system that utilizes a torque wrench for greater precision.
Cleaning and Maintaining the Elegoo Mars 3
Cleaning and maintaining the Elegoo Mars 3 is crucial to ensure its longevity and quality of prints. Here are some tips and tricks to keep your Elegoo Mars 3 in top condition:
1. Use a soft cloth to clean the printer’s LCD screen, build plate, and aluminum vat.
2. Regularly check and clean the FEP film for any scratches, residue, or cloudiness. Replace the FEP film once it starts to wear out.
3. Avoid exposing the Elegoo Mars 3 to direct sunlight or heat sources.
4. Keep the printer’s firmware updated to the latest version to ensure better print quality and stability.
Tips for Resin Printing with the Elegoo Mars 3
The Elegoo Mars 3 is a great 3D printer for anyone who is a fan of resin printing. With a build size of 127 x 88 x 155mm and a resolution of 0.047mm, it offers a good balance between quality prints and affordability. However, resin printing requires some special considerations to get the best results, so it’s important to know some tips and tricks before you start printing. Let’s take a look at the best ways to get the most out of your Elegoo Mars 3.
Choosing the Right Resin for Your Project
Choosing the right resin for your Elegoo Mars 3 3D printer can make all the difference between a successful print and a failed one. There are different types of resin available in the market that cater to different print requirements. Here are factors to consider when choosing the right resin for your project:
- Viscosity: Resin with higher viscosity is ideal for creating fine details and sharp edges, while lower viscosity resin is better suited for large prints.
- Color and Transparency: Choose the color and transparency of the resin based on your project requirements, as different resins give different effects.
- Curing Time: Fast-curing resin is suitable for prototypes and small prints, while slow-curing resin is better for larger prints and projects that require more time for post-processing.
- Consider the printing volume of Elegoo Mars 3 and Elegoo Mars 3 Pro while choosing the resin for your 3D prints, as Elegoo Mars 3 Pro comes with an increased printing volume and requires more resin quantity.
Using Supports and Orientation to Improve Print Quality
When using the Elegoo Mars 3 for resin printing, utilizing supports and proper orientation can significantly improve the print quality. Here are some tips and tricks for getting the most out of your Elegoo Mars 3:
1. Use high-quality supports to prevent warping and ensure the stability of the print.
2. Consider printing the model in multiple parts and assembling them afterward for complex designs.
3. Optimize the orientation of your model to reduce the number of supports required and improve the surface finish.
4. Clean and level the build plate regularly to avoid errors in printing.
With the Elegoo Mars 3 Pro being the upgraded version of this printer, it comes with a better build plate, improved linear rails, and more. But if you are looking for a cheaper alternative with many similar features, the Elegoo Mars 3 is an excellent choice.
Post-Processing Techniques for Resin Prints
Post-processing is an essential step to get a high-quality resin print out of your elegoo mars 3 or elegoo mars 3 pro printer. Here are some effective post-processing techniques that you can use for your resin prints.
- Washing: Soak your resin print in an isopropyl solution for at least ten minutes to remove excess resin.
- Curing: Cure the print under UV light for better strength and quality of the print.
- Sanding and Polishing: Sand and polish the print with fine grit sandpaper to remove rough edges and add a smooth texture to the surface of the print.
- Painting: Use acrylic paint to add color to your resin print.
- Assembling: After finishing the post-processing steps, assemble the parts if you have printed multiple parts for your object.
These post-processing techniques will help you to get better-quality prints, more durability, and a professional-looking finished product from your marvelous elegoo mars 3 or elegoo mars 3 pro printer.
Troubleshooting Common Issues with the Elegoo Mars 3
Performance issues and hardware malfunctions are always more common on 3D printers, and the Elegoo Mars 3 is no exception. With the Elegoo Mars 3, you may encounter problems such as failed prints, poor quality prints, and even hardware problems. This article will provide helpful tips and troubleshooting strategies to help you fix common issues with the Elegoo Mars 3.
Uneven Layers or Lines on Prints
Uneven layers or lines on prints are a common issue when using Elegoo Mars 3 3D printer. Here are some troubleshooting tips to help resolve this issue and improve your printing quality.
- Check the leveling of the build plate. Make sure it is level and the distance between the FEP film and the LCD screen is consistent.
- Check the tightness of the build plate. It should be snugly tightened to the Z-axis guide to prevent wobbling or shifting during printing.
- Check the quality of the FEP film. A worn-out, scratched, or damaged FEP film can cause uneven prints.
- Check the orientation of the model. Incorrect orientation of the 3D model can lead to uneven layers or lines.
- Upgrade to Elegoo Mars 3 Pro. The improved features of the Mars 3 Pro, including the new carbon fiber matrix build plate and linear rail design, can help to eliminate the issue of uneven prints.
By following these tips, you can troubleshoot and fix the problem of uneven layers or lines on your Elegoo Mars 3 prints, and achieve a better printing quality.
Prints Sticking to the FEP Film
One of the common issues users face with the Elegoo Mars 3 is 3D prints sticking to the FEP film. This problem can be easily resolved by following a few tips. Firstly, it is recommended to use a release agent such as PTFE spray or silicone oil on the FEP film before starting the printing process. This will help prevent the print from adhering to the FEP film and will make it easier to remove the print once it is complete.
Secondly, slowing down the lift speed of the printer can have a significant impact on the success rate of printing. By reducing the lift speed to 50mm/min, the print will detach from the FEP film gradually, rather than too quickly, which could cause damage to the print. Finally, make sure that the build plate is leveled correctly and the FEP film is tightened enough to avoid any wrinkles on its surface. By following these simple tips, you can prevent prints from sticking to the FEP film, which can save you a lot of time and headache.
Resin Leaking During Printing
Resin leaking during printing is a common issue with the Elegoo Mars 3, which can be addressed by following a few simple steps. However, if the problem persists, it could be an indication of a more severe issue. Here are some tips and tricks to prevent resin leakage and ensure successful printing with the Elegoo Mars 3:
1. Make sure that the resin vat is correctly leveled and that there are no loose screws or bolts that could cause leakage.
2. Clean the FEP film regularly to prevent contamination and ensure a smooth printing surface.
3. Avoid overfilling the resin tank, as it can cause spillage and leakage during printing.
4. Upgrade to the Elegoo Mars 3 Pro, which features enhanced build quality and improved resin vat design to prevent leakage. Before deciding to upgrade to Elegoo Mars 3 Pro, consider your printing requirements and budget as both Elegoo Mars 3 and 3 Pro have their pros and cons.
Upgrading and Enhancing Your Elegoo Mars 3
Elegoo Mars 3 is a powerful 3D printer that is perfect for hobbyists and professionals alike. However, the printer can be upgraded to get even better results. Let’s look at some of the tips and tricks to help you get the most out of your Elegoo Mars 3 and the differences between the 3 and 3 Pro versions.
Installing Firmware Upgrades
Upgrading the firmware of your Elegoo Mars 3 is essential for enhancing its performance and unlocking new features. Here are the steps to follow to install firmware upgrades:
1. Head to the Elegoo website to download the latest firmware for the Elegoo Mars 3.
2. Connect your Elegoo Mars 3 to your computer using a USB cable.
3. Turn on your 3D printer and navigate to the “Tools” menu using the touchscreen.
4. Select “Update Firmware” and follow the prompts to upload the firmware file to your Elegoo Mars 3.
Enhancing Print Quality with Third-Party Software
Third-party software is a fantastic way to enhance the print quality of your Elegoo Mars 3 3D printer. Using software such as Chitubox and PrusaSlicer can improve the print quality and unlock new features of your printer. Here are some tips and tricks for upgrading and enhancing your Elegoo Mars 3 printer with third-party software:
- Install Chitu Box or PrusaSlicer and learn to use their advanced features. These software packages offer advanced support, image editing, and model manipulation tools to help you create high-quality prints.
- Experiment with different resin types and settings to find the optimal print settings for your printer. Each resin has unique print settings and may require different exposure times, layer heights, and other parameters.
- Invest in a high-quality calibration device to ensure your printer is properly calibrated and produces accurate prints.
Consider upgrading to the Elegoo Mars 3 Pro, which offers improved print quality, faster print times, and a larger build volume than the Elegoo Mars 3.
Adding LED Lighting for Better Visibility During Printing
Adding LED lighting to your Elegoo Mars 3 printer can significantly improve visibility during the printing process and enhance the overall quality of your prints. Compared to the Elegoo Mars 3 Pro, which already comes with built-in LED light strips on the sides and bottom, Mars 3 requires a little bit of modification to optimize lighting conditions for better printing. Here are the steps to follow to add LED lighting to your Elegoo Mars 3 printer:
1. Purchase a USB-powered LED light strip and a USB splitter cable.
2. Attach the LED light strip to the inside of the printer’s top cover using adhesive tape.
3. Connect the USB splitter cable to the printer’s USB port, and then plug in the LED light strip and the printer’s USB cable to the USB splitter cable.
4. Use the 3D printer software to adjust the brightness and color of the LED light according to your needs.
Adding LED lighting to your Elegoo Mars 3 can not only improve visibility but also add an aesthetic touch to your printer setup.